Managing Backups
Any application that you install in BuffsCreate using the cPanel/Installatron is set to automatically create a backup of the whole app every time the software updates. The backups expire after 14 days, but they can quickly eat up quota space in that time, especially since some apps (such as WordPress) update automatically. Follow the steps in each section below to take more control over the space that backups use in your account.
1. Turn off the automatic Installatron backup
- Go to your cPanel
- Go to Applications > WordPress > My Applications.
- From there, select the wrench next to your site’s name.
- Scroll down to Automatic Update Backup and set that to Do not create a backup

2. View restore points in R1Soft Backups App
The R1Soft Restore Backups app can be found in the “Files” section of your cPanel dashboard.

This app should already be active so there are no additional steps you need to take to set it up. R1Soft automatically creates an off-site backup of your files and databases nightly. You can open the app from your cPanel to verify that there are restore points listed. More information about how this app works can be found in this documentation from our hosting provider, Reclaim Hosting, under the “Automated Offsite Backup” heading: https://reclaimhosting.com/backups-done-right/.
3. Create a manual Installatron backup before major changes
While R1Soft creates daily backups of all of your content, it’s best practice to have a backup of your application from right before you start tinkering, just in case anything goes wrong. That way you won’t lose any content that’s been added or changed since the latest daily backup. As a bonus, backups created through the Installatron are easy to restore with a single click. These manual backups can even be sent to an offsite location like Dropbox to save space.
To create a manual backup:
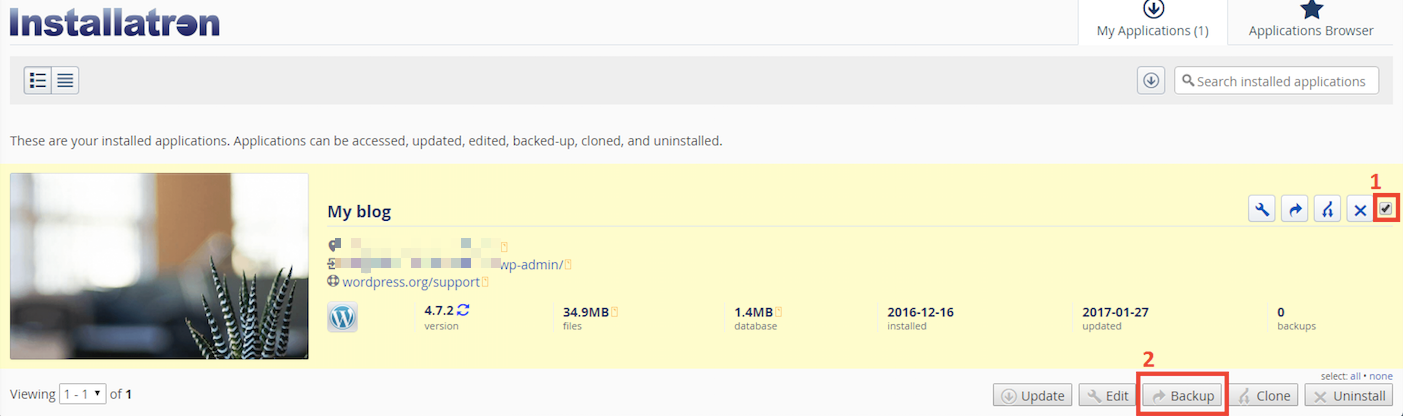
- From your cPanel, click My Apps in the Applications section.
- Click the checkbox to the far right of the application name (labeled 1 in the screenshot below).
- Click “Backup” below the bottom of the application list (labeled 2 in the screenshot below).
- On the next screen, enter a descriptive label and click Backup again. The backup will run with a status bar.